Mixer
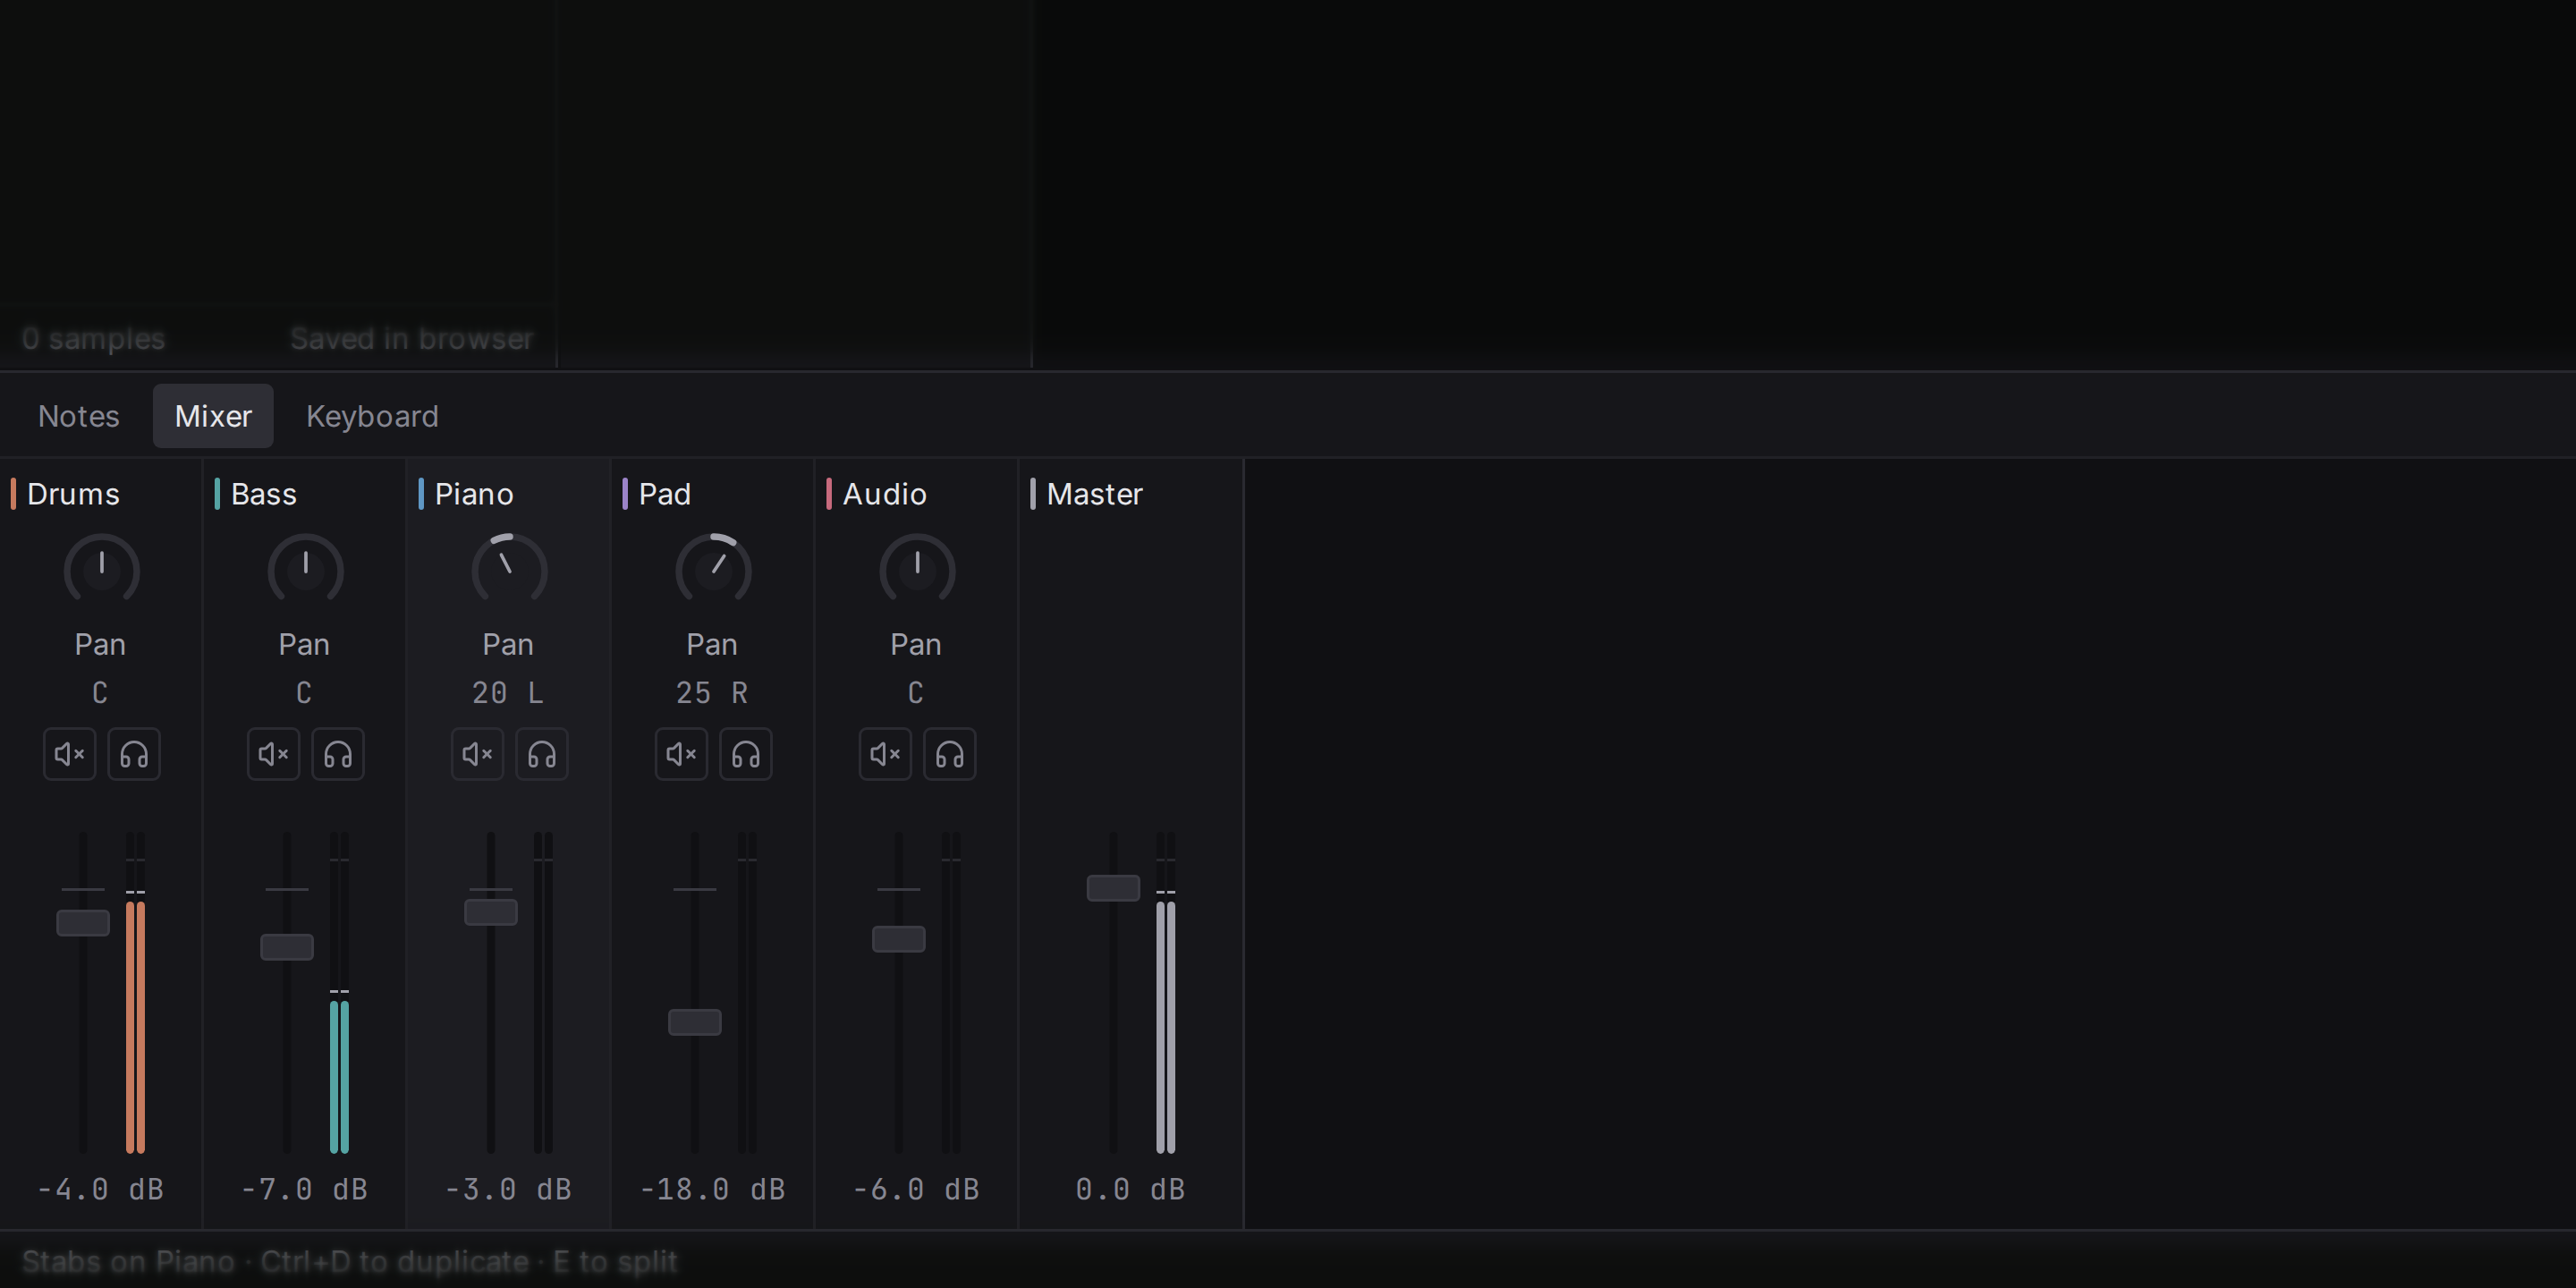
The mixer is where you balance tracks against each other: how loud each one is and where it sits between the speakers. Open it with the Mixer tab in the bottom panel. Each track has a vertical strip, a channel, and the last strip is the master, the sum of everything you hear.
Volume
The fader sets a track’s volume in decibels (dB), the unit engineers use for loudness because it matches how we hear: every 6 dB down is about half the signal, and our ears judge that as a step, not a halving. 0 dB leaves the track as the instrument made it, negative values turn it down, and the fader goes up to +6 dB. At the bottom, −60 dB, the track is silent, shown as −∞.
Faders work like every other control: drag (with Shift for fine steps, Esc to cancel), double-click to type a value, Ctrl-click to return to 0 dB, or focus it and use the arrow keys.
A good habit is to start with every fader down a little and bring up the most important part first (often the drums or the vocal), then fit the rest around it.
Pan
The pan knob places a track between the left and right speakers. Centre (C) plays it equally from both; turning it spreads the sound across the stereo field. Keeping bass and kick in the centre and moving chords and percussion a little to the sides makes a mix clearer, because parts stop hiding behind each other. Use headphones to hear these examples clearly.
Flesance pans with equal power: a sound moved from the centre to one side keeps the same perceived loudness.
Sends
In the desktop app. A send passes a copy of a track’s sound to another track, usually one with a reverb or a delay on it, while the track itself plays on as before. The inspector shows a knob for each send, named to and the track it goes to (for example to Shared reverb), next to the volume and pan: turn it up to put more of this track into that one. This is how several parts share one reverb: see a shared reverb.
Meters
The meters show how loud each track is right now, on a decibel scale from -60 dB at the bottom to 0 dB at the top. A thin line stays at the highest recent level for a moment (the peak hold) so you can read it. Meters also appear next to each track in the arrangement.
Master
The master channel carries the whole song. Its meter is the one to watch: digital audio cannot go above 0 dB, and anything louder is cut off flat (clipping), which sounds like harsh crackling. When the master meter turns red, bring the loudest tracks down rather than raising everything else.
Exporting the mix
When a song is ready to leave the studio, export it as a WAV file: choose Export mix… from the project menu behind the Flesance mark at the left of the transport bar, or from the command palette. The studio renders the song with the same engine you hear while playing, only faster than real time and without playing it aloud.
Where the file goes depends on where you work. On the web, your browser downloads it. In the desktop app, pressing Export first asks where to save it: the dialog opens with the project’s name already filled in, and cancelling it exports nothing.
- Whole song runs from the start to the end of the last clip, and a few seconds more if notes are still ringing, so a final chord fades out instead of being cut.
- Loop range is exactly the stretch between the loop’s start and end, with no tail, so the file can be looped again in another program.
Muted tracks are left out, and solo works as it does while playing. The loop and the metronome are never part of the file.
There are two formats. 24-bit opens in every program and is what you send to people. 32-bit float keeps peaks above 0 dB instead of clipping them, which matters when the file goes on to more mixing or mastering. After the export the dialog shows the file’s peak level; if a 24-bit file has clipped, lower the master and export again.
The mix and its parts
In the desktop app. Under Files the export dialog offers The mix and its parts: besides the mix, one file for each track at the top of the song (a group counts as one). Each part is as long as the mix and keeps its place in it, so the parts played together are exactly the mix. People ask for these parts, often called stems, to remix a song, to mix it again elsewhere, or to play it live with some parts left out. 24-bit files get a faint noise added when they are written (dither), which keeps quiet fades smooth; exporting again gives the very same file.
Notes as MIDI
In the desktop app. Export notes as MIDI, from the project menu, writes the song’s notes to a standard MIDI file, one track per part, with the swing in the timing. Use it to take a melody or a beat into another program or to print it as sheet music elsewhere. No sound is in the file, only the notes.
Loudness
In the desktop app, the export dialog also asks how loud the file should be:
- As it is leaves the level exactly as it sounds in the studio.
- For streaming sets the song to the −14 LUFS that streaming services play songs at, with peaks under −1 dB. It does this with one plain change of gain over the whole song: no limiter is added, and nothing about the sound changes except its level.
Either way the studio measures the mix before writing the file and says in the status bar what happened:
- the loudness and peak of the file as exported;
- that it was turned down, or up, and by how many decibels;
- that it is quieter than streaming plays, because turning it up further would clip, in which case a Limiter on the master is what makes it louder;
- that it goes over full scale and clips, with the name of the loudest track, so you know where to start turning down.
Nothing is done to the song without saying so. Loudness for streaming explains what the number means.
A long song takes a moment to render. The studio keeps working while it does, and Cancel stops the export at once.